Save a laptop webcam
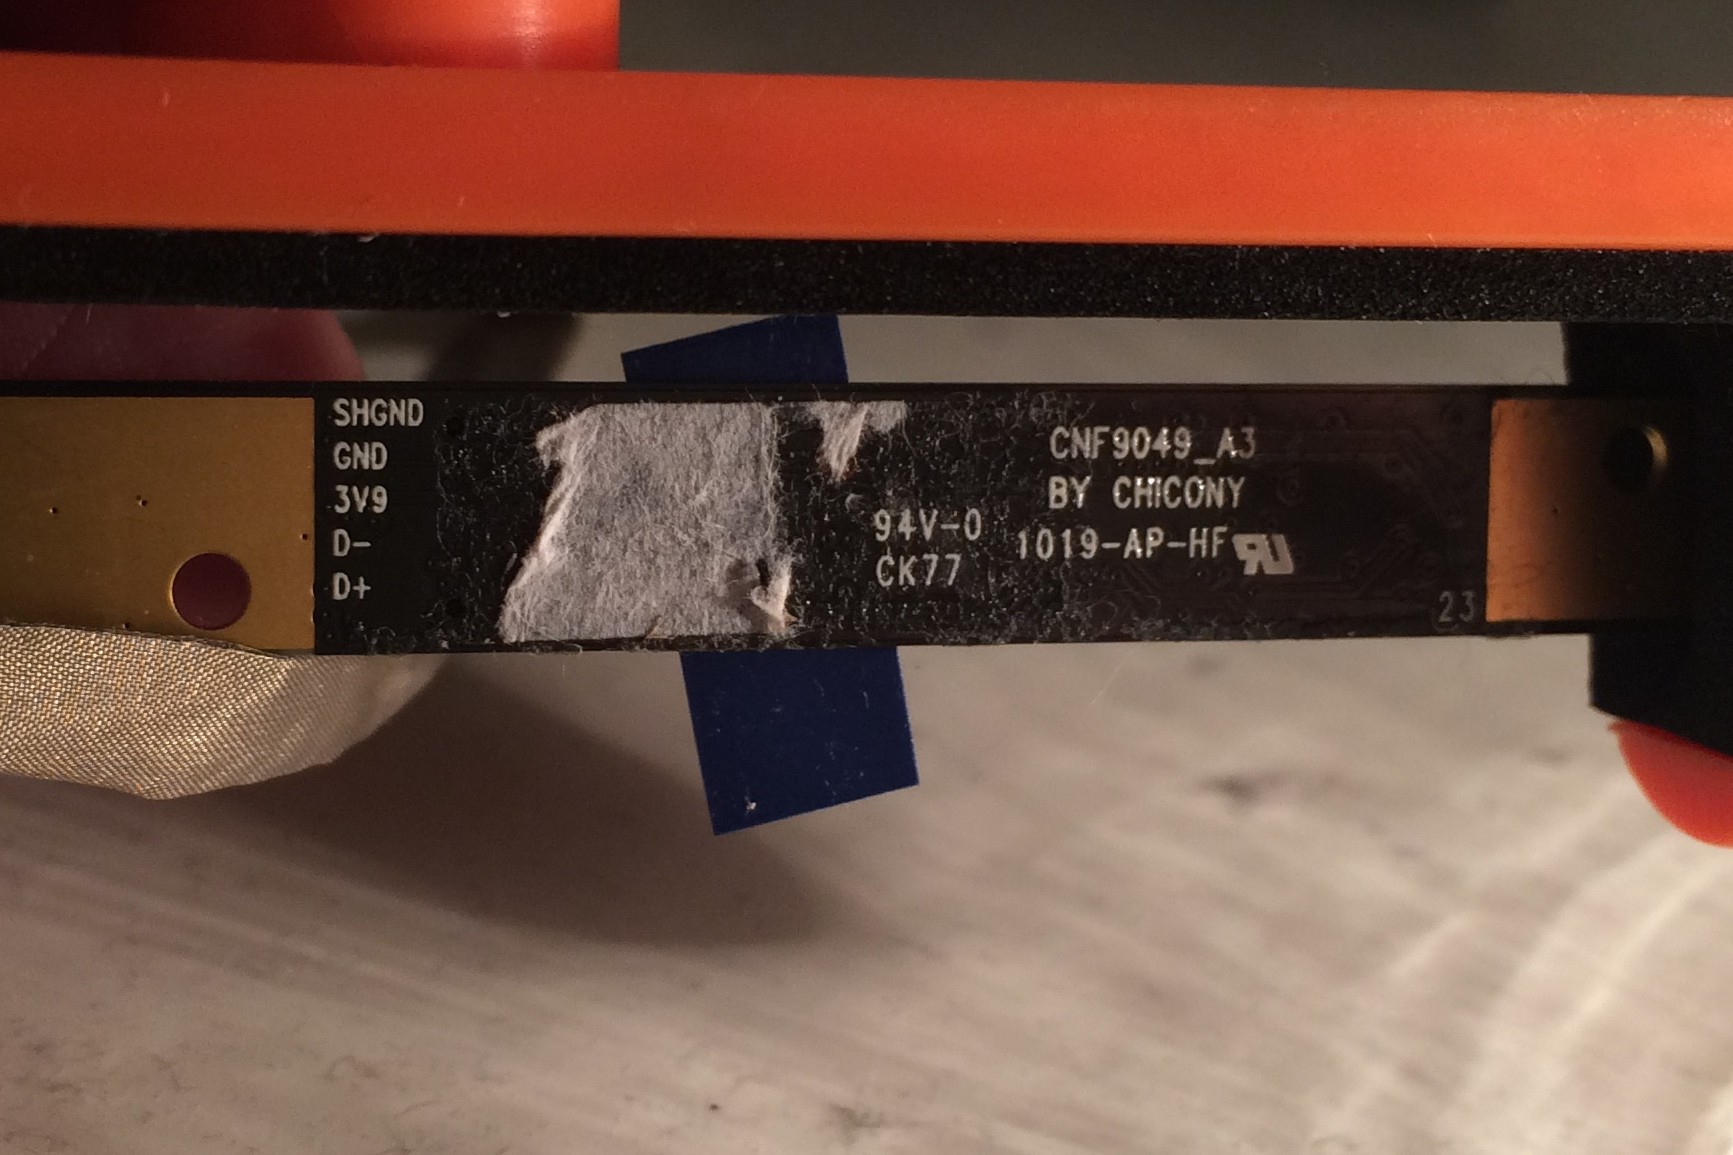
Some time ago I received a broken laptop (HP G62 model A18ED). When I switched it on, the power LED and fans would go on, but that’s it. I hooked up an external screen to see if anything would happen but it did not. It was really dead so I decided to strip all potentially useful parts: RAM, Processor, keyboard, Wifi module and the webcam. I cut the connector cable of the webcam and figured it must be a USB webcam. I couldn’t find much information about it, but it reads:
94V-0 CK77
CNF9049_A3
BY CHICONY
1019-AP-HF
This is the back of the webcam:
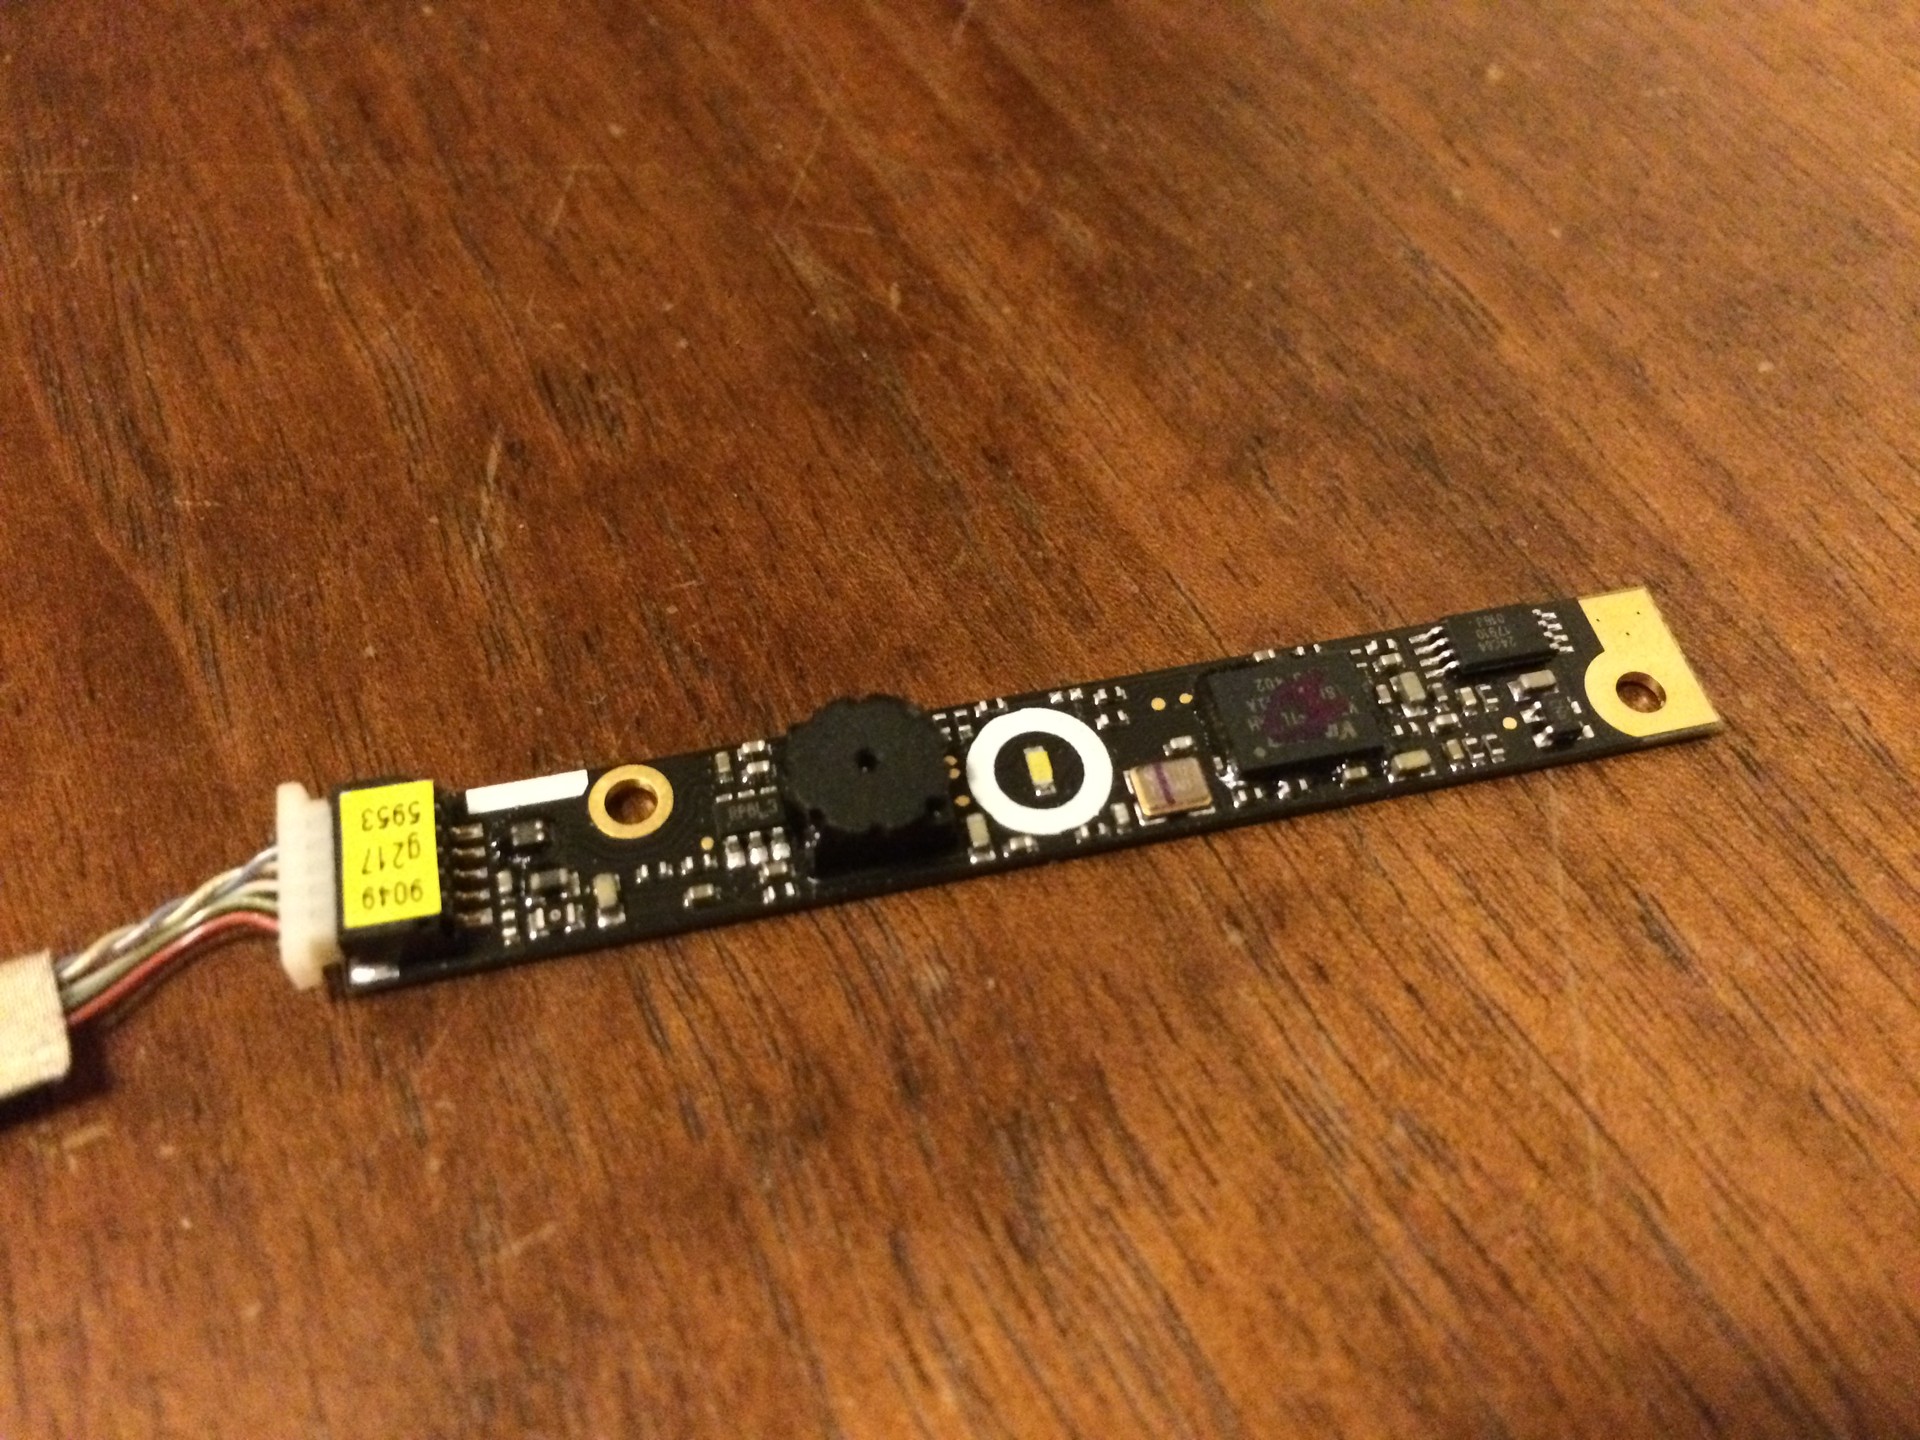
And the front:
The other end of the cable after I stripped it:
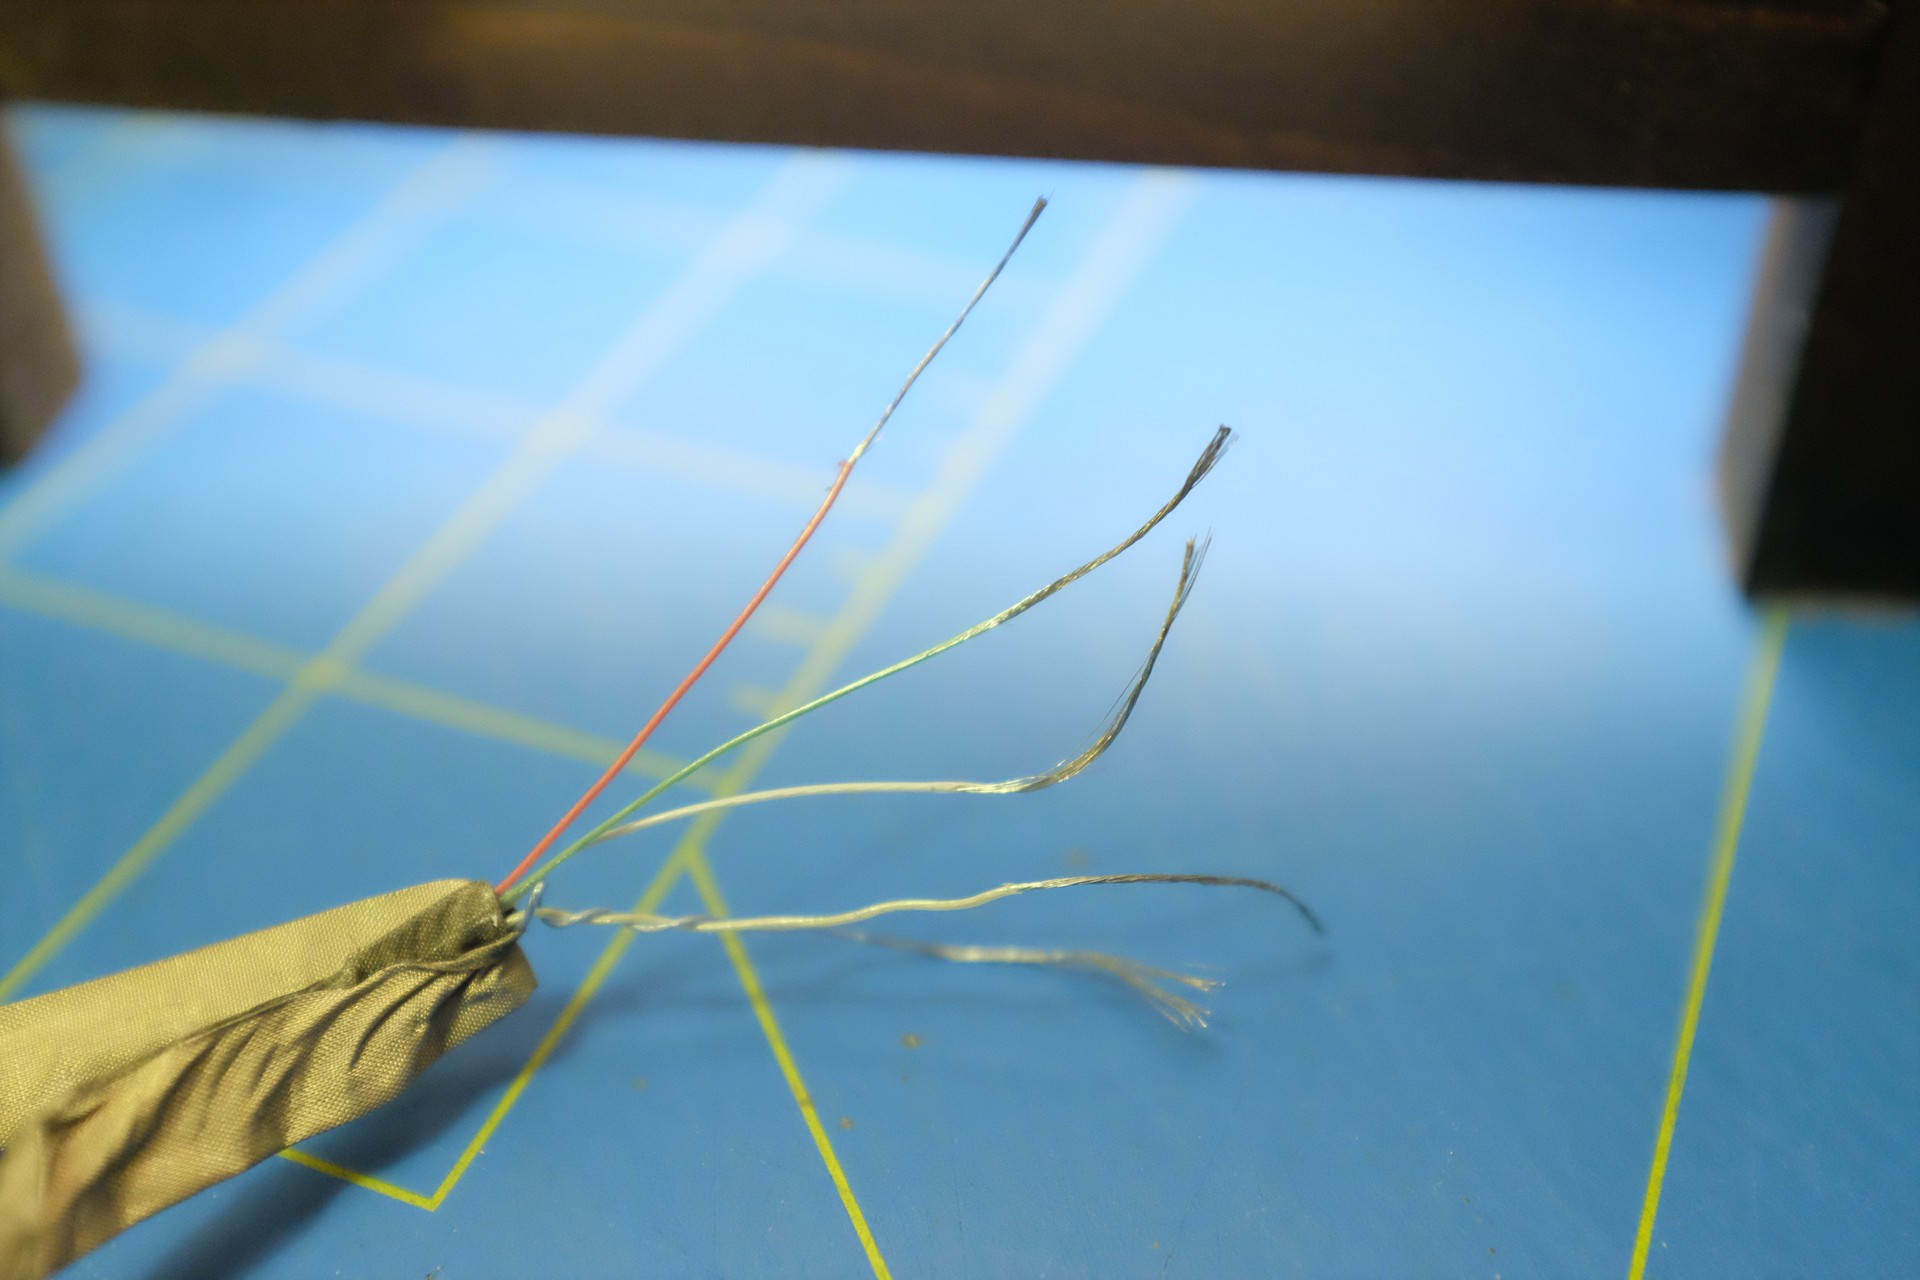
The meaning of the individual cables is clearly marked on the back and apparently this camera requires 3.9 volts instead of the normal 5 volts that USB supplies. The twisted pair contains the USB data channels. Time to build a little circuit that includes a voltage regulator!
WARNING: I’m a software engineer, electronic circuits and soldering are not my strengths! :)
There are fixed voltage regulators, but I couldn’t find one that would bring me 3.9 volts, so I needed an adjustable voltage regulator. The LM317T is just what I needed.
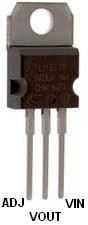
The LM317T let’s you adjust the output voltage by adding resistors to your circuit.
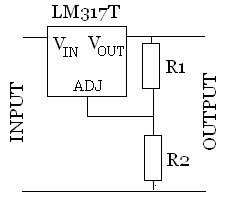
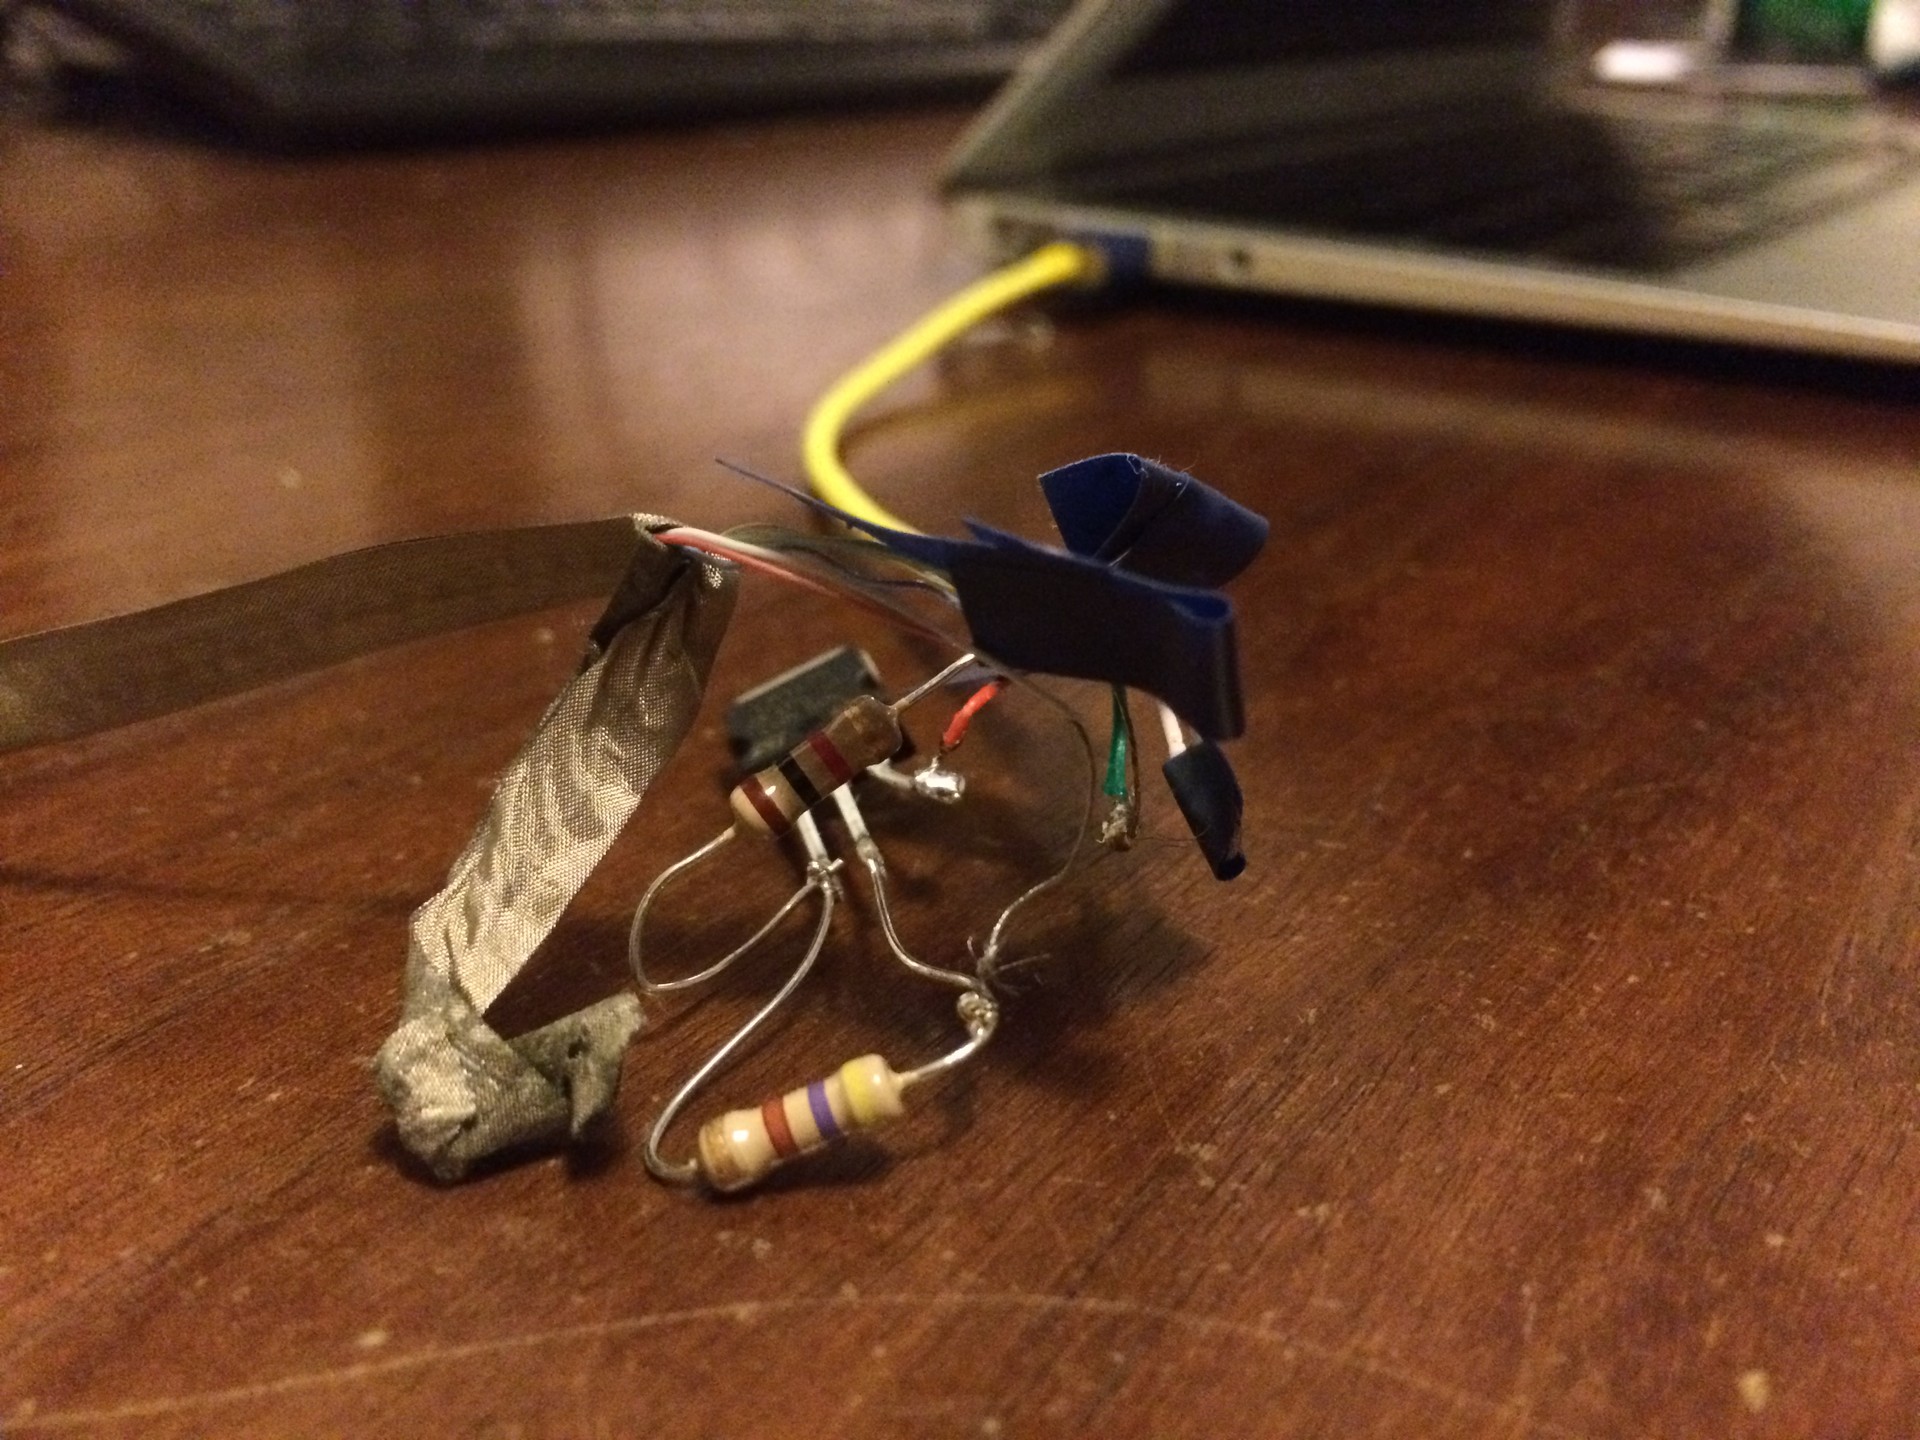
You can lookup which resistors you need here. In order to get 3.9v I needed a 470Ω resistor for R1 and a 1000Ω for R2. Also note that the green wire (GND) does not need to be connected, just the red one (SHGND). I took apart a cheap Chinese lightning cable for the USB part and made this pretty little circuit. Sorry! :D
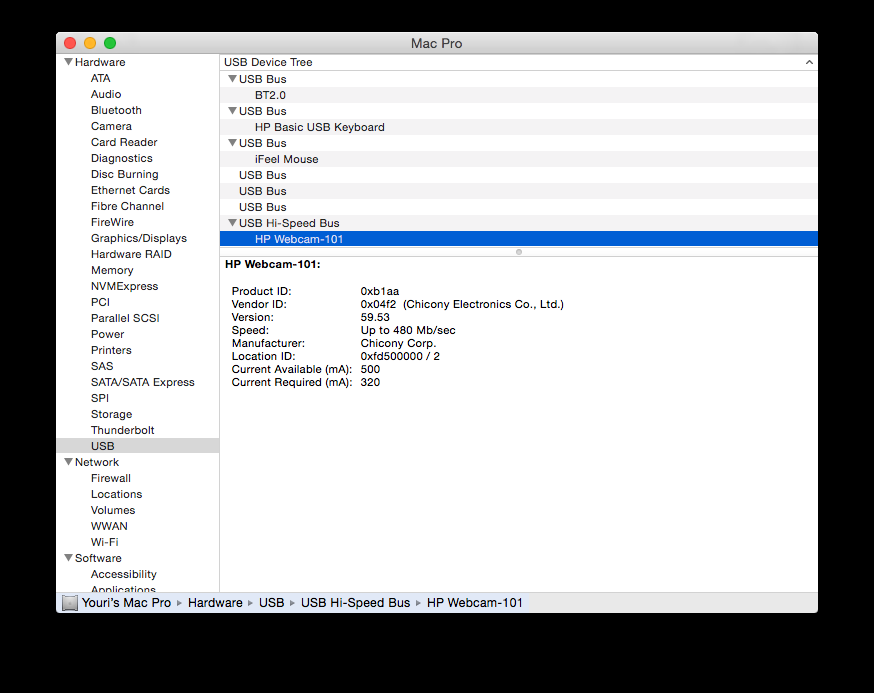
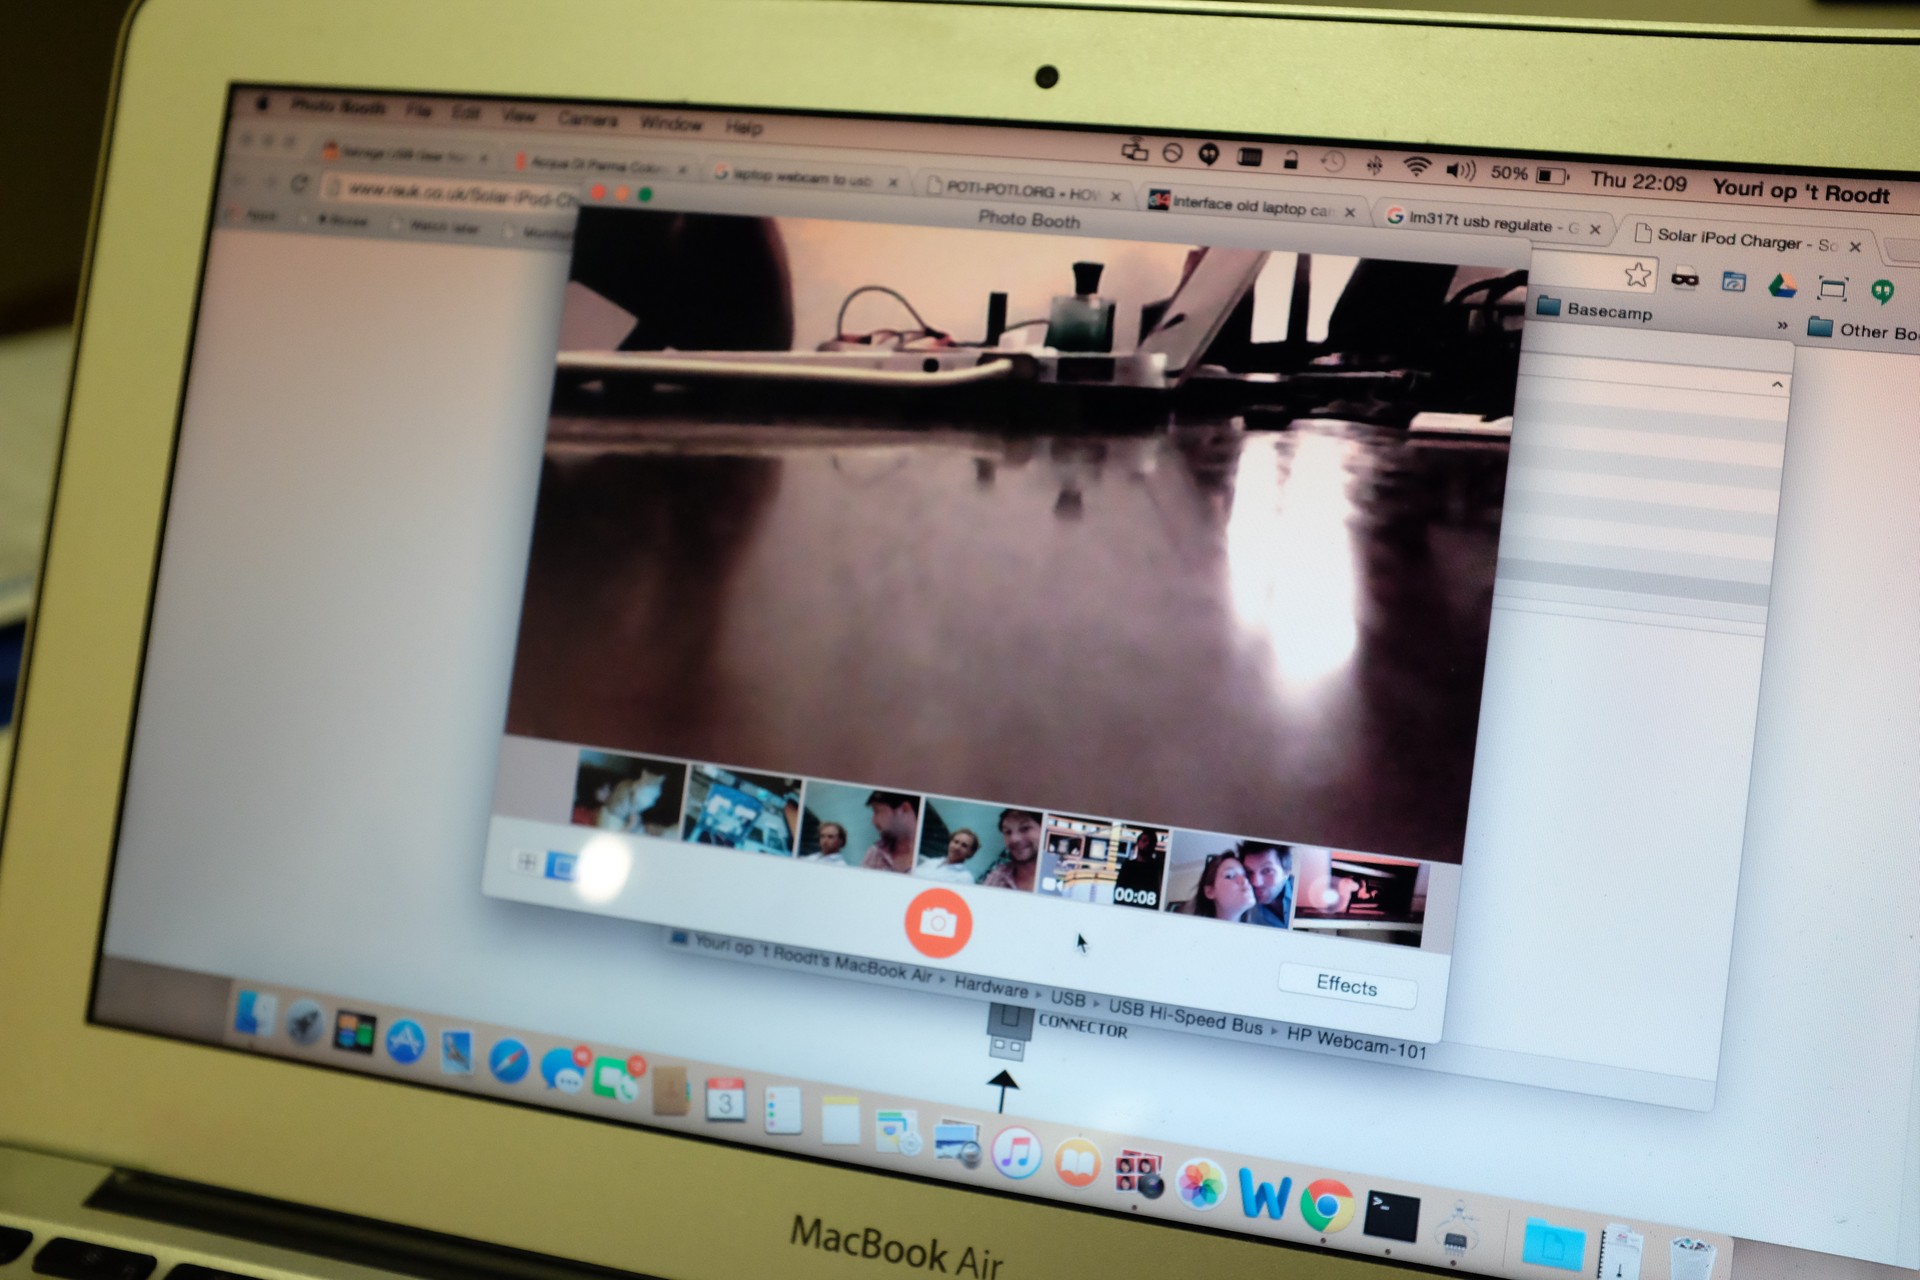
I plugged it in and it was immediately recognised as an HP Webcam-101, made by Chicony Corp. So far, so good. Let’s start Photo Booth…
Yup, seems about right.
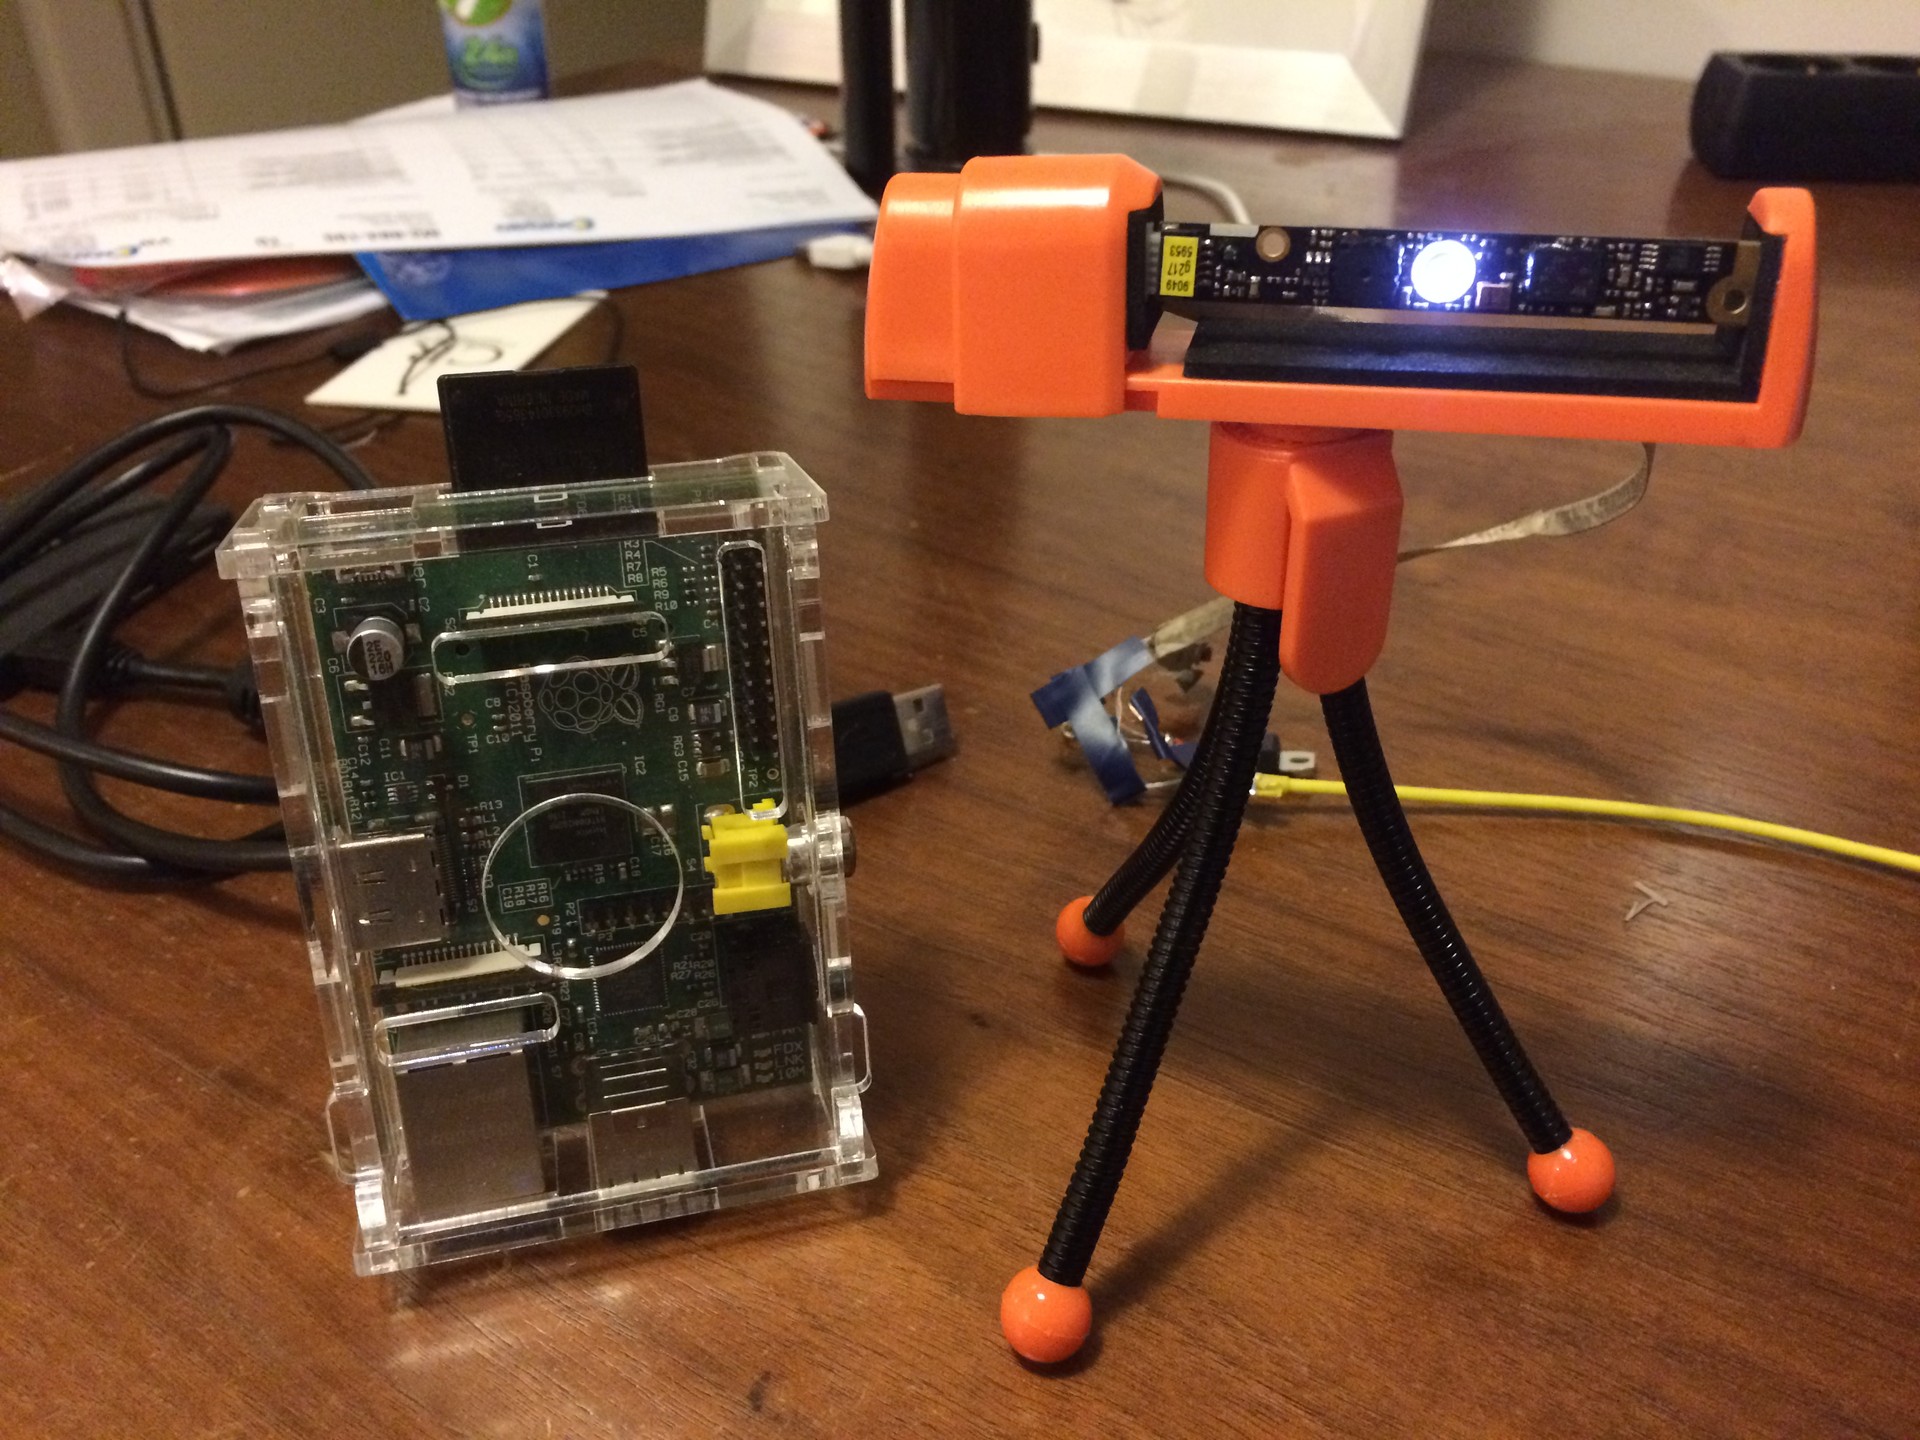
Just for show, I put it on a tripod. It’s actually hooked up to my MacBook Air here, but I did try it on the Raspberry Pi Model B and it’s recognised just fine under Raspbian. It’s fun to set it up as a surveillance camera using motion, but the camera quality is really bad in low light. I followed these steps, except for the ones that concern the Raspberry Camera as I’m using a plain webcam.